The first thing I did was take pictures of a friend in such a way that some were close up and others were far away but they weren't all perfectly lined up.
Then I added then into a folder on a Mac and opened Photoshop.
Then I went to 'File', 'Automate' and then 'Photomerge'.
Next I added the folder full of my joiner photos into photoshop.
These are all the files I added, and I un-ticked the 'Merge Photos together' box.
I waited a while for them to load up and then moved them around to where I wanted them.
Then I added another layer behind them all and made the background black.
These are just different places in which I tried the pictures to see where they looked best.
Then I had to resize the image because it was too big a file.
So I went to 'Image', 'Image Size'..
Then I changed the 'Height' to '640' so that it was smaller.
Then I went to 'File' and then 'Save for web and devises'.
Then this box came up and I clicked on '4-up'.
Then I clicked on the best looking image, changed it to JPEG and then saved it.
This is the final image.
I think it worked to a certain extent. I think there are too many legs for the image but I think it was a great first attempt.
I think it worked out pretty well although next time I think I would take more pictures of smaller parts and not just of whole things like faces.
I also think I would try and get more background into the shots so that it didn't look as bare.
Second go.
I decided to have another go and see whether I could have a better turn out this time.
So I used a keyboard this time.
I decided to have another go and see whether I could have a better turn out this time.
So I used a keyboard this time.
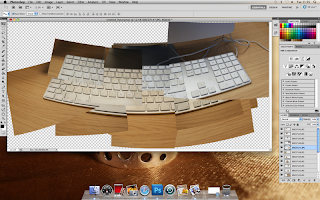
I loaded it all up the same as I did last time. And it turned up landscape this time. It had sorted them out pretty well already but I wanted to change it a bit.
Then I resized a couple of pictures to fit.
This is the final image.
I think this one really works I like how the keyboard is curved, and in different colours.
I also like how some of the keys are repeated and it fits really well.
Buildings
I decided to have a go at montaging something bigger, like a building.
I think this one really works I like how the keyboard is curved, and in different colours.
I also like how some of the keys are repeated and it fits really well.
Buildings
I decided to have a go at montaging something bigger, like a building.
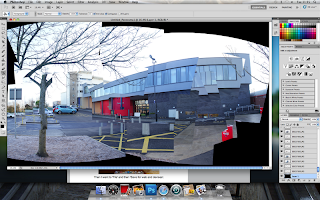
I did all the same things to set it up as I did before, although this time the Mac completed the picture quite well so that the building was in one piece, which was not what I wanted so I had to move some of the pictures around to my liking.
Then I resized it and this is the final image.
I like how it really looks like a work of art, some buildings are built to look like this. It's all pointy and 'sticky outy'.
This time I decided to do a bigger montage with more images.
So I did the front of the college:
This is it in Photoshop.
This is the final picture. I took about 78 pictures of the building and the trees around it. I love how the building has curved forwards and how there are different colours of the building from where the sun was shining ,ore in some pictures then others.
I am thinking about doing one massive montage of the college starting here at the front and walking all the way around the start of the Atrium. Hopefully it would create an amazing 3D image where the building curves all the way around the picture.
I had another go at the windmill joiner:
It includes my feet and I think it worked out a lot better then before. I am using it as my final image.


No comments:
Post a Comment