Wednesday, 22 February 2012

Ideas and my final image.

Our final image has to have the minimum of 50 images included in it. I have come up with a few ideas that I could do:

- The whole front of the college
- Cutlery
- Myself
- My room
- Cameras
- My close

All images are to be shot in small JPEG files on our cameras so that when we merge all the images on Photoshop it doesn't become a massive sized file.

A good joiner image should include:
-A landscape or enviroment
-A person
-Involve the viewer, in the style of David Hockney (i.e feet or hands in shot)


I decided to have a go with the windmill because I thought that it would be really interesting to see how the different angles and shapes turned out in a montage.
I think I took about 84 pictures, small picture quality.


This is the pictures being loaded into Photoshop to be merged.


This is my second attempt with the classroom. Your final image has to include a body part of some kind so I used my feet.


This is the final image, I don't think it worked out how I thought it would.


The importance of camera settings.


There are a few main factors that should be considered when photographing for a joiner:

Picture size: You need to make sure that the picture size of the photos you are taking are on small Jpeg so that if you have like 50 images that you are planning on uploading to Photoshop it does not take forever and the size of the finished image will be massive if you don't. 

Lighting: The lighting is very important when taking so many pictures at different times. You are going to what to try and get them all in the same hour or so, so that there is the same lighting in all the shots, unless you are after the effect of different lighting.

Focus: The focus of a picture is important to any thing you are doing in photography. 

Joiners and montages in the product industry.

Montages

Montages are used all the time in the product industry from album covers to movie posters.
I think this is a great idea it really makes the pictures stand out, it's such a creative idea and it really works.
I think it really helps sell a product when it is different and stands out and thats what people what.


The difference between a montage and a joiner:

A montage: This is a number of different pictures put together to create a group of pictures, like this: 


A joiner: Is a lots of pictures of the same thing but from different angles or close up and then putting all the photos together to create a jumbled up photo of the main picture, like this:


Wednesday, 8 February 2012

Polaroid images.

Today we looked at polaroid images.
We used a program called: Poladroid 9.6 and it works by taking images you give it and making them into polaroid type shots. 

This is the app open.

You just drag the pictures the want done into the camera and it drops it out and falls onto the desktop as a polaroid.

Then you have to wait for it to develop. 

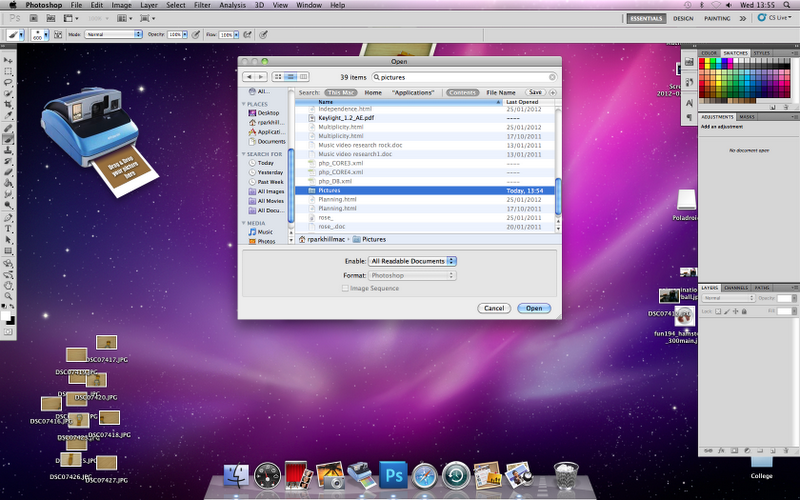
Then to open the polaroids I opened Photoshop then went to; 
File,
Open,
Applications,
Pictures and then highlighted the ones I was going to use in my montage.


Then once they were all open in Photoshop I opened a new blank page and dragged them all onto it.

Then I rearranged them to how I wanted them.
I used pictures of my watch because I thought it was an interesting shape to mix around.
Though I didn't think it worked this time. I think next time I will take more pictures of the item I am using and make them really small, maybe use about 30/35 pictures.

These are the pictures I used:


Tuesday, 31 January 2012

My try at creating joiners.


The first thing I did was take pictures of a friend in such a way that some were close up and others were far away but they weren't all perfectly lined up.
Then I added then into a folder on a Mac and opened Photoshop.

Then I went to 'File', 'Automate' and then 'Photomerge'.

Next I added the folder full of my joiner photos into photoshop.

These are all the files I added, and I un-ticked the 'Merge Photos together' box.

I waited a while for them to load up and then moved them around to where I wanted them.


Then I added another layer behind them all and made the background black.


These are just different places in which I tried the pictures to see where they looked best.


Then I had to resize the image because it was too big a file.
So I went to 'Image', 'Image Size'..

Then I changed the 'Height' to '640' so that it was smaller.

Then I went to 'File' and then 'Save for web and devises'.

Then this box came up and I clicked on '4-up'.

Then I clicked on the best looking image, changed it to JPEG and then saved it.


This is the final image.
I think it worked to a certain extent. I think there are too many legs for the image but I think it was a great first attempt. 
I think it worked out pretty well although next time I think I would take more pictures of smaller parts and not just of whole things like faces.
I also think I would try and get more background into the shots so that it didn't look as bare.


Second go.


I decided to have another go and see whether I could have a better turn out this time.
So I used a keyboard this time.
I loaded it all up the same as I did last time. And it turned up landscape this time. It had sorted them out pretty well already but I wanted to change it a bit.


Then I resized a couple of pictures to fit.


This is the final image.
I think this one really works I like how the keyboard is curved, and in different colours.
I also like how some of the keys are repeated and it fits really well.


Buildings


I decided to have a go at montaging something bigger, like a building.


I did all the same things to set it up as I did before, although this time the Mac completed the picture quite well so that the building was in one piece, which was not what I wanted so I had to move some of the pictures around to my liking.


Then I resized it and this is the final image.

I like how it really looks like a work of art, some buildings are built to look like this. It's all pointy and 'sticky outy'. 


This time I decided to do a bigger montage with more images.

So I did the front of the college:

This is it in Photoshop.

This is the final picture. I took about 78 pictures of the building and the trees around it. I love how the building has curved forwards and how there are different colours of the building from where the sun was shining ,ore in some pictures then others.

I am thinking about doing one massive montage of the college starting here at the front and walking all the way around the start of the Atrium. Hopefully it would create an amazing 3D image where the building curves all the way around the picture.

I had another go at the windmill joiner:


It includes my feet and I think it worked out a lot better then before. I am using it as my final image.