Tuesday 24 April 2012
Wednesday 28 March 2012
Pin hole photography
We were looking at Pin Hole Photography and how to turn our own digital cameras into Pin Hole Camera.
The first thing we had to do was turn the camera off and take the lense off.
Then you have to cover up the 'contacts' (Where the lens connects) to stop the camera shorting out. Masking tape is perfect for this job because it is not too sticky and doesn't leave residue when removed.
Then cover the whole of the front with Tin Foil and secure with more masking tape, again useful because it doesn't leave marks.
Then, using a pin, carefully poke a small hope in the center of the foil. This allows the light in when you take the picture.
This photo is the result of adding more then one whole to the foil. It adds a multiplied affect because the light is coming through more then one hole so the camera sees more then one perspective of the image and uses them all on the one photo, creating something like this.
This is with just one hole. Taken outside in the sun.
Most of the photos are quite out of focus. But you can still tell what they are off.
This is a photo of the sun, I love the light flare that has been captured in this shot.
Wednesday 7 March 2012
What is the difference between a joiner and a montage.
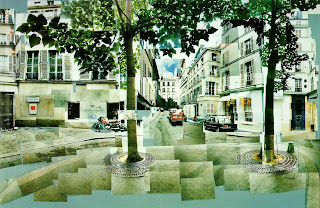
A joiner is a collection of images joined together to create a large scale image, like this:
A montage is when you piece together lots of separate images to create a collage, like this:
Wednesday 29 February 2012
Everybody's changing, and I still feel the same.
I tried mixing faces up landscape and portrait to see which looked better.
I then tried adding and taking away colour.
These are the pictures I used.
These are the final images.
Monday 27 February 2012
Macro, but not.
The first thing you do is load a photo in Photoshop, and duplicate the layer. (CMD J)
Then add a layer mask.
Then switch the fore/background colour to black by clicking the little arrows.
And then fill in the layer mask in black.
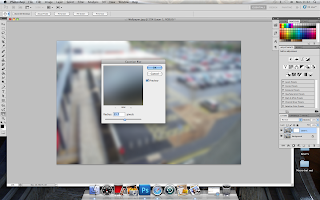
Then go to Filter, Blur and then Gaussian Blur.
Then add loads of pixels, but just enough so that you can still tell what the picture of of.
Then click on the layer mask and click the paint bucket onto the picture and the blur will go.
Then click on the Gradient tool.
Make the foreground white, and then change the gradient tool so that it fades from white to transparent.
Then click and drag the curser and add blur to where ever you want.
This is my final image.
Subscribe to:
Posts (Atom)


